|
Spell Check
Click on TOOLS on the menu bar at the top of your screen. Select Spell Checker. Follow the instructions or see HELP in MS Word.
You’ll need to get the cursor into the footnote space, too, and run Spell check there. Otherwise, footnotes don’t always get included. Easiest way: In the menu bar at the top of the screen, choose VIEW >> NORMAL. Then click on VIEW again, and FOOTNOTES. Now you can see them.
Auto Correct Settings
Go to TOOLS >> AutoCorrect and follow the settings as in the screen below:
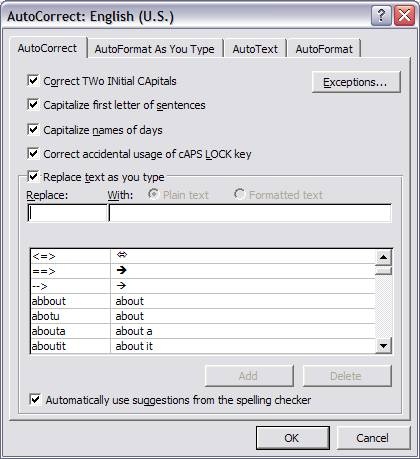
Next screen:
Settings for Spell Check and Grammar Check:
Highlight your entire text [ctrl A], go to the Tools menu, Language, and make sure the language is set as “English (U.S.)”.
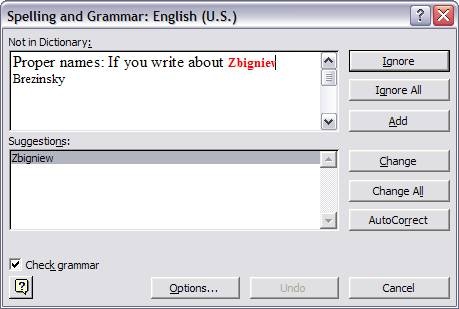
Go to the beginning of your text. Then click on the TOOLS >> SPELLING AND GRAMMAR. Check the box at the bottom for “Check Grammar.”

Select Options button from above screen and go to the "Options" screen below:
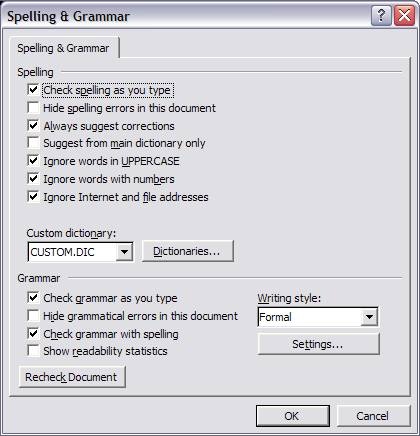
Select “Settings.”
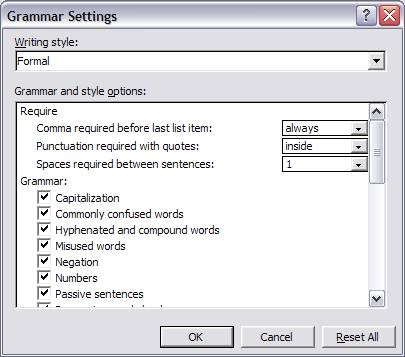
- Spaces between sentences: 1.
- Punctuation required with quotes: inside.
- Comma required before last list item: always
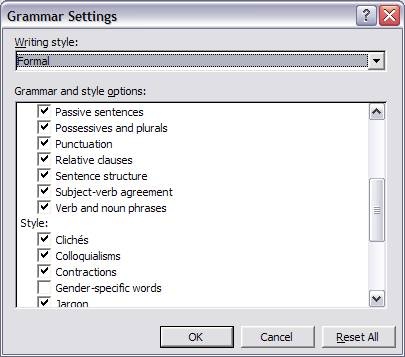
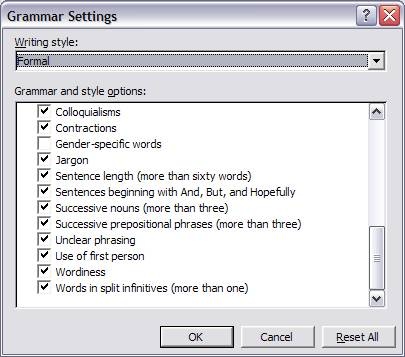
Running this utility will bring to your attention all words and phrases that might be questionable. You still have to know whether you mean “effect” where Microsoft expects “affect,” but this is the best way to go through your whole file and verify everything.
For each proper name or special term that you use, when you are sure it is correct, you should choose “Add to Dictionary.” Then you will never be prompted again to verify that one (except when you have spelled it wrongly). Proper names: If you write about Zbigniev Brezinski and don’t know how to spell it, it won’t enhance your credibility but if you managed to fix it once and ADD to the dictionary one time it will help you throughout the book.
How to Use Styles
Start with ONE complete file, not multiple chapters in separate files; ptherwise you'll have to do everything over again in each separate file.
For your convenience, you can get an MS Word .dot template with the styles that we use by clicking the link below.
Click this and SAVE it (don't open it) to your computer. THEN open it, in MS Word. Sample template
And then:
1. Insert all your dedication (if any, and all your chapters in sequence into this new file: Place the cursor at the beginning, then click on the menu: INSERT >> FILE. Go to the end of the document (scroll down, or go "CTRL End"), INSERT Chapter 1, and repeat the same operation as you add one chapter after the other.
Save this as your new manuscript file.
2. Place your cursor in each paragraph that needs special style formatting, then open the Style Dropdown Menu (Heading 1 - in this example) and select the style to be applied.

3. Here is a list of such paragraphs:
a. Headings:
Chapter title: select Heading 1,
Subheadings: select Heading 2,
Subordinate select Headings Heading 3 (or even Heading 4)
b. Motto (if any): select Motto
c. Indented text (i.e. block quotes) : select Hanging Indent
d. Bullets: select Bulleted
e. Numbered List: select Numbered
f. Footnotes: select Footnotes
In order to verify your work, you can do the following:
1. Go to Menu >> Tools >> Options >> View tab
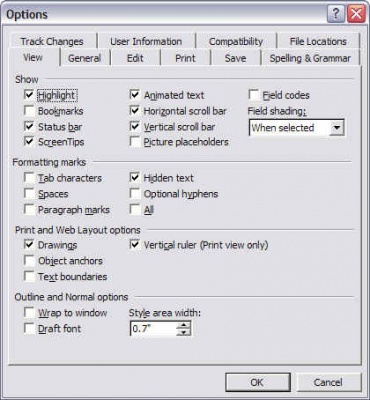
2. At the bottom of the box select Style Area Width: enter: 0.7"
3. Click OK
4. Go to Menu >> VIEW >>NORMAL, and it will display the styles in your manuscript, paragraph by paragraph. You can go back change the styles as necessary.
You can also go back to Menu >> View >> Print Layout.
Now, get rid of that stuff in the right margin by going back to TOOLS >> OPTIONS and setting the STYLE AREA WIDTH back to 0".
How to Insert a Footnote
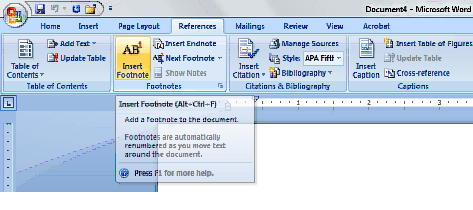
Here is more detailed info about Footnotes, using Microsoft Word 2007.
1. In print layout view, click where you want to insert the note reference mark.
2. On the References menu, click Insert Footnote.
3. In order to select which kind of Footnotes, Click “Footnotes” on the right of the word “Footnotes”, and then you get the image below.

For Help on an option, click the question mark and then click the option.
Click OK.
Word inserts the note number and places the insertion point next to the note number.
Type the note text.
Scroll to your place in the document and continue typing.
If you have inserted endnotes already:
1. Go to INSERT >> FOOTNOTES >>
2. Click on Options
3. Click on Convert

4. Convert all endnotes to footnotes.
5. Go to VIEW >> FOOTNOTES - if the Footnote is not highlighted there is no footnote in the text.
Search in your text for where the first footnote should be:
If there is no footnote:
Go to INSERT >> FOOTNOTE. A box will be created at the bottom of the page.
Then paste the text of footnote No 1 in the box at the bottom of the page next to the No 1. Do the same for each footnote, one by one.
|
